What frames v2 changes in 2026
Frames v2 moves beyond static images to support full interactive apps, onchain transactions, and persistent state within the Farcaster feed.
The shift from v1 to v2 marks the transition from simple image cards to stateful applications. Previously, frames were limited to displaying a static image and a single input button. When a user clicked, the frame would reload with new data, but it could not maintain context between interactions or trigger complex logic. This limitation kept frames largely decorative or useful only for very basic data retrieval.
V2 introduces a runtime environment that supports interactive elements, allowing developers to build richer experiences directly within the social feed. This includes support for onchain transactions, meaning users can execute smart contract functions without leaving the client. It also enables user notifications, allowing apps to alert users about events that occurred while they were away from the feed.
For developers, this means frames are no longer just a way to display data; they are a platform for building applications. The ability to handle state and interact with the blockchain opens up use cases that were previously impossible, such as real-time gaming, complex voting systems, and dynamic social interactions. This evolution positions Farcaster as a more robust environment for Web3 social applications, distinguishing it from other social graphs that rely on simpler embed standards.
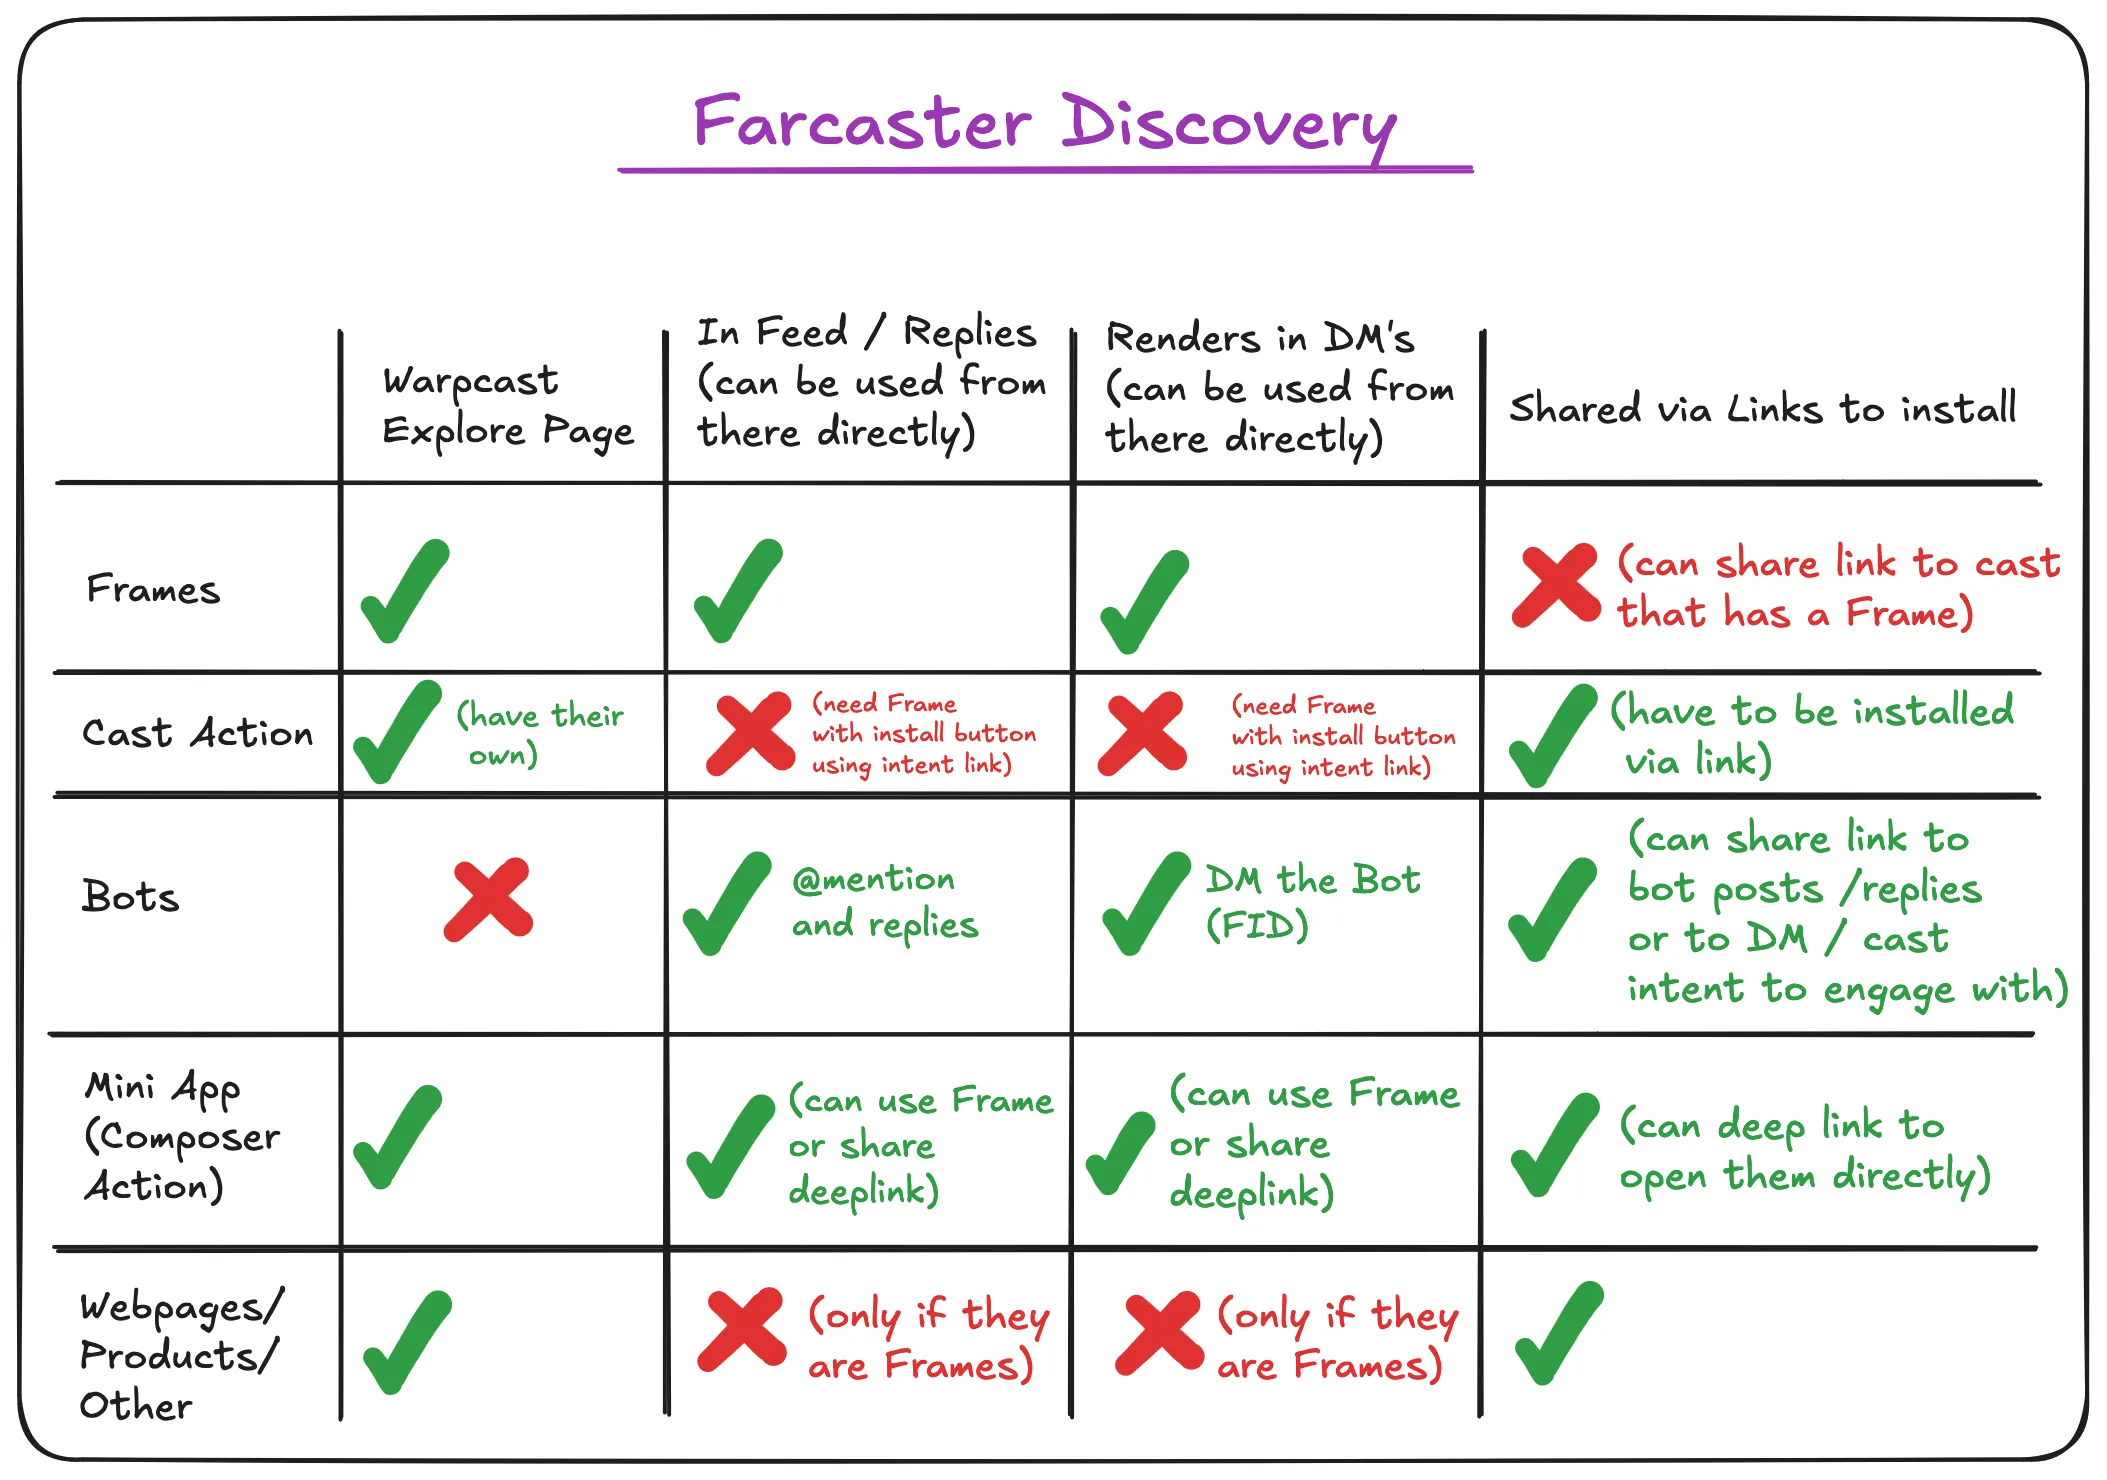
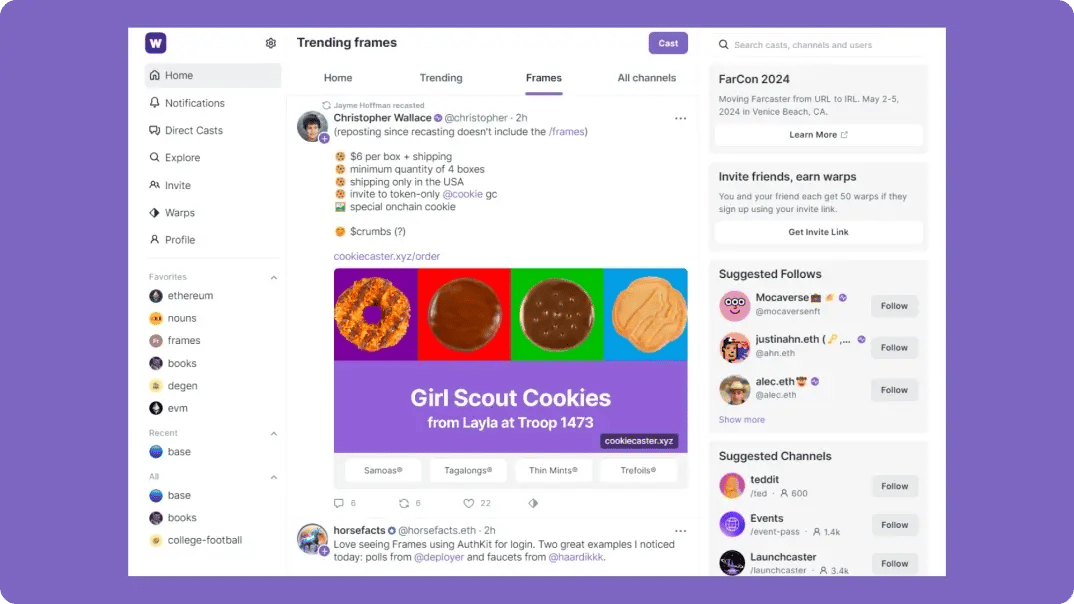
Compare top clients for frame hosting
Choosing a client determines how your frame renders and who sees it. Warpcast holds the majority of active users, while alternatives like Supercast offer different interfaces and features. The table below compares the three major clients on frame support, deployment ease, and audience reach.
| Client | Frame Support | Deployment | Audience Reach |
|---|---|---|---|
| Warpcast | Native, first-class support | Direct publish from app | Largest active user base |
| Supercast | Full frame compatibility | URL-based or app-based | Growing, niche-focused |
| Yup | Standard frame rendering | URL-based | Moderate, developer-friendly |
| Farcaster (Web) | Basic frame support | URL-based | Large, desktop-focused |
Warpcast remains the default choice for maximum visibility. Its native integration means frames load instantly without external redirects, and the app’s algorithm favors interactive content. If your goal is broad adoption, start here.
Supercast and Yup offer strong alternatives for specific use cases. Supercast provides a clean, minimalist interface that some users prefer for focused interactions. Yup is particularly developer-friendly, with straightforward URL-based deployment that makes testing and iteration faster. The Farcaster web client offers basic support, making it a viable fallback for desktop users, though it lacks the polished mobile experience of dedicated apps.
Set up your development environment
To build Farcaster Frames, you need a local environment that supports Next.js, TypeScript, and React. The official frames-v2-demo repository provides a ready-to-run template that handles the complex metadata and server-side logic for you.
Follow these steps to get your local server running:
Ensure you have Node.js (v18 or later) and npm installed on your machine. You can verify the installation by running node -v and npm -v in your terminal. The frames-v2-demo relies on modern Node features, so an up-to-date version is required.
Navigate to your preferred project directory and clone the official demo repo:
git clone https://github.com/farcasterxyz/frames-v2-demo.git
cd frames-v2-demo
This repository contains a Next.js app pre-configured with the necessary dependencies and boilerplate code for frames v2.
Run the following command to install all required packages defined in package.json:
npm install
This step downloads the React, TypeScript, and Farcaster SDK libraries needed to compile and serve your frame.
Start the development server with:
npm run dev
The app will typically start at http://localhost:3000. You can now view your frame in a browser or use the Farcaster client to test the interactive elements.
With the server running, you are ready to modify the frame metadata and button actions. The frames-v2-demo repo includes comments explaining where to change the title, image, and button labels. For more detailed documentation on the frame SDK, refer to the Farcaster Frames v2 Dev Preview Docs.
Build your first interactive frame
A Farcaster Frame v2 is a self-contained web application rendered inside the Farcaster client. Unlike static embeds, v2 frames handle user interactions through a strict request-response cycle. The client sends a POST request to your server with the current state and button presses, and your server responds with updated metadata and optional new buttons.
The architecture relies on two main parts: a server-side handler that processes state and a client-side React component that manages the UI. We will use the official frames.js SDK, which simplifies the heavy lifting of signing requests and parsing responses.
Initialize a new Next.js project with TypeScript. Install the core dependencies: frames.js for SDK functions and viem for Ethereum signature verification. Your project structure should separate the API route (server) from the React component (client).
Create an API route at /api/frame. This endpoint receives the frame action. You must verify the signature in the request header to ensure the action came from a valid Farcaster client. Parse the state object to retrieve the current counter or user input. Update your internal state (e.g., increment a counter) and return the next frame state.
Use the Frame component from frames.js/react. This component handles the rendering of the frame image and buttons. It automatically manages the button click events and sends the POST request to your API route. Define your buttons with labels and actions that map to specific state changes.
Frames are stateless by default. To maintain context between interactions, you must pass a state object in the frame response. This object is opaque to the client but available to your server on the next request. Store simple values like counters or user IDs here. For complex data, consider storing the ID in the state and fetching the full record from your database on the server.
Deploy your API to a public URL. Use the Farcaster Frame Playground to test the interaction loop. The playground allows you to simulate button presses and view the server response without posting to a cast. Ensure your signature verification logic is correct before testing in the main client.
The following code snippet demonstrates the core server handler structure using Next.js App Router and frames.js.
Key points to remember:
- Always verify the frame message signature. Skipping this allows anyone to spoof frame actions.
- Keep the
stateobject small. It is serialized into the frame image metadata and has size limits. - Use
frames.jsutilities to handle the complexity of message parsing and signature verification.
Deploy and test your frame live
Before making your frame public, you must host the backend assets on a secure, publicly accessible server and verify the frame renders correctly within a client like Warpcast. This stage separates a local prototype from a functional social app.
Farcaster clients require all frame metadata and action endpoints to be served over HTTPS. Upload your index.html (containing the frame metadata) and any server-side action handlers to a reputable host like Vercel, Netlify, or AWS S3. Ensure your DNS records are configured and that the domain resolves without redirect loops. If you are using a custom domain, verify the SSL certificate is valid and not expired.

Once hosted, copy the URL of your frame's HTML file and paste it into a new cast on Warpcast. The client will fetch the metadata and render the frame preview. Check that the image, title, and button labels appear as intended. If the frame fails to load, check your browser console for CORS errors or mixed content warnings, which often occur if your server returns insecure resources.
Click the buttons on your live frame to trigger your action endpoints. Verify that the server receives the POST request with the correct fid, url, and buttonIndex. Log the response to ensure your server returns the expected actionResult (e.g., "success" or "error"). If your frame mints an NFT or updates a database, confirm the transaction completed successfully. A common pitfall is returning an invalid JSON response, which causes the client to display a generic error.
Ensure your frame's og:image and twitter:image tags match the visual state users will see. If your frame updates dynamically based on user interaction, confirm that the metadata reflects the current state. Use the Farcaster Frame Validator tool if available, or manually inspect the HTML source to ensure all required fields (fc:frame, fc:frame:image, fc:frame:button:1) are present and correctly formatted.
Frame launch readiness checklist
Before publishing your frame to the mainnet, verify that your server endpoints and metadata are fully compliant with the Farcaster protocol. A single missing header or incorrect response code will cause clients to reject the frame entirely.
- Metadata Validation: Ensure
og:image,og:title, andpost_urlare present and correctly formatted in your HTML head. Use the official Frame Playground to test rendering across different clients. - Action Endpoints: Confirm that your
post_urlandbutton_urlendpoints return a valid 200 status code and a properly structured JSON response containingactionandimagefields. - Security Headers: Implement rate limiting and verify that your server does not expose sensitive environment variables or internal IP addresses in error messages.
- Mobile Compatibility: Test your frame on both desktop and mobile clients. Ensure images are responsive and buttons are tappable on smaller screens.
Use the Frames v2 Demo from the official Farcaster GitHub repository to validate your implementation against the latest standard. This demo app provides a reliable baseline for NextJS + TypeScript + React integration.
Common frame development: what to check next
Developers often encounter specific hurdles when moving from prototype to production with Farcaster Frames v2. Below are direct answers to the most frequent technical questions regarding state persistence, authentication, and client compatibility.
For more detailed implementation guides, refer to the official Farcaster documentation and community resources like Developer DAO.
No comments yet. Be the first to share your thoughts!